
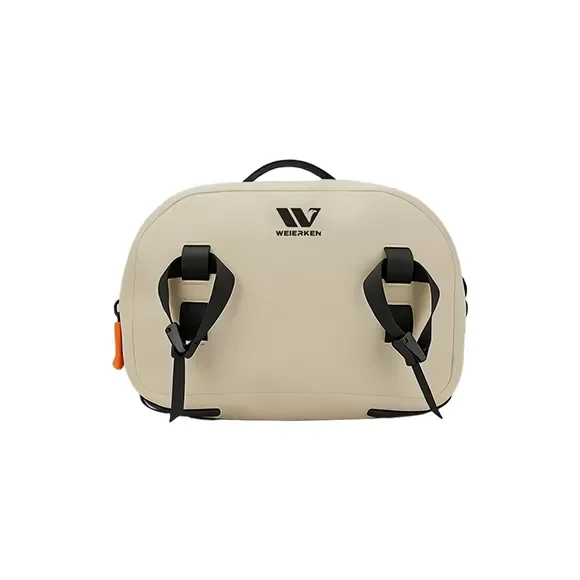
A custom fishing bag tool tether interface should connect the bag-side anchor, tether connector and tool-side attachment before a sample is approved. Identify the actual tool, intended reach and parked position, then review the complete arrangement with the bag in its normal loaded orientation. Keep access and closure clearance separate from any independently required strength or protection evidence. A visible ring is a development reference, not proof of compatibility with every connector. Send Weierken an identified assembly and use sequence so the proposed construction and open questions can be reviewed against the actual project.
This guide concerns accessory organization on a fishing bag. It does not establish a lifting point, a fall-protection system, a rescue attachment or a certified dropped-object prevention system.

Start with a complete connection, not a ring count
Write the review as three separate interfaces: the bag-side anchor, the tether or connector, and the tool-side attachment. A ring that accepts one clip may be too crowded for another. A thin cord may pass through a handle hole, while a snap hook does not. The attachment location also changes when the same bag is worn around the waist rather than across the body.
For Weierken development enquiries, send the intended tool and connector dimensions with the custom bag RFQ. Front and side photographs are useful, but include a close view of the actual attachment opening. The sample discussion can then address the assembly instead of assuming that any visible loop is interchangeable.

Use one filled-in interface sheet
The following is a demonstration brief, not a customer case or a specification for W07-26SS. The tool dimensions are illustrative; replace them with measurements of the accessory that will be supplied.
| Review field | Example entry | Decision or evidence needed |
|---|---|---|
| Tool to carry | Fishing pliers; 180 mm overall length; protective sheath included | Provide the actual sample, including protruding handles and sheath |
| Tool connection | Tool has a dedicated closed attachment opening | Photograph the opening and measure its clear internal size |
| Bag connection | Proposed outer side attachment, away from the main opening | Mark the location on a photograph; do not treat it as rated before verification |
| Resting position | Tool parked in its sheath; tether kept outside the zipper path | Record front and side views with the bag packed |
| Working reach | Right-hand retrieval while wearing the bag | Review waist and sling positions separately if both are required |
| Release and storage | Connector accessible without opening the main compartment | Check intentional removal, loose-end management and pack-away sequence |
This sheet gives purchasing, development and sampling a shared reference. Keep the tool, connector and bag sample revision on the same record. If one changes, reopen the affected checks rather than approving the replacement from a catalogue photograph.
Separate useful reach from an uncontrolled loop
A longer connection is not automatically more convenient. Review the shortest usable arrangement in the intended carrying position, with the tool safely sheathed whenever it is not in use. Observe the path beside shoulder straps, loose webbing, zipper pulls and the main opening. Do not wrap a tether around the body, and do not assume that attaching a tool makes carrying an exposed blade or hook safe.
For a retractable accessory, identify the housing dimensions and the direction in which the line exits. For a coiled accessory, show the resting coil as well as the extended working position. These are different layouts; approving one does not approve the other. The carrying-system guide can help frame the wider carrying review, but the actual accessory combination still needs checking.

Review the loaded bag through an ordinary use sequence
- Pack and wear: use the intended contents and carrying adjustment. Record whether the tool rests against the body, the bag or another item.
- Retrieve: check whether the user can identify and reach the correct tool without dragging the connection across the opening.
- Return: place the tool back in its sheath or designated holder. Look for a loose connection hanging below the bag or crossing a closure.
- Change position: review the movement from wearing to setting the bag down. Do not use the accessory connection to lift the bag.
- Pack away: define how the tool and tether are removed or secured for transport, cleaning and storage.
Record observations, not a blanket “works well.” A useful note is “the proposed side connector blocks the zipper pull when the bag is set down.” The next sample change can then be specific: move the connector location, change its orientation or choose a different approved accessory. Log that change using the sample revision record.
Keep structural and environmental claims separate
A visual fit review does not establish attachment strength, saltwater durability or waterproof performance. If a procurement programme requires those claims, specify the exact component, intended use and agreed verification method separately. Do not transfer a tether supplier’s rating to the bag-side anchor. Do not transfer a fabric description to a modified finished bag.
Adding or moving attachment features may affect the construction around them. Ask for a close photograph of the proposed assembly and identify whether it changes a protected compartment or an existing load path. Our waterproof construction checklist explains why the finished construction matters beyond a fabric name. Neither the photo above nor this example grants a performance rating.
FAQ: fishing bag tool-tether development
Can any exterior ring be used as a tool-tether anchor?
No. Appearance does not establish intended use or strength. Identify the proposed ring, its attachment to the bag, the connector and the tool. Approve fit and any required structural verification for that combination; never use an unverified accessory point for lifting or personal safety. Identify the exact bag anchor and proposed connector in the controlled sample record. Keep any required strength evidence separate from a convenient visual match, and ask the responsible development team to approve the actual assembly.
Should we specify a fixed, coiled or retractable tether first?
Start with the tool’s resting and working positions, then compare the candidate accessory layouts. Record housing or coil clearance, connector fit and loose-end management. The choice depends on the reviewed combination, not the bag capacity alone. Keep the intended reach, parked position and surrounding closure path visible in the brief. Ask the supplier to distinguish the proposed construction from operating claims that require their own evaluation for the actual bag and tool.
What evidence makes a sample comment actionable?
Use a marked photograph showing the interference, identify the bag and accessory revisions, and describe the step at which it occurs. “Connector crosses the main zipper when set down” is more actionable than “make the tether better.” Keep before-and-after views in the same revision record. Connect the observation to the actual tool, connector, bag orientation and sample revision. Preserve any condition outside the review and identify the person responsible for deciding whether another physical sample or test is required.
Does adding a tether preserve the original bag’s waterproof claim?
Not automatically. Establish whether the proposed attachment alters the protected construction, then review the changed finished assembly against the agreed requirements. A photograph or a material label cannot prove performance after a modification. Keep the original construction identity and any changed attachment interface in the approval record. A layout review does not establish a retained protection claim; request suitable evidence for the actual modified arrangement before using that claim.
What should trigger another review after a tool changes?
Review the affected interfaces when the tool handle, connector, tether construction or bag attachment changes. Keep the original accepted assembly identifiable and compare the new arrangement with its intended reach, parked position and closure clearances. Ask the responsible team which observations remain applicable and which require another sample review. Preserve the resulting decision with the component and bag revisions before extending the approval.
Who this brief is for
Best for bag brands, distributors and OEM product developers reviewing a defined tool-carrying arrangement. Suitable for a controlled sample with identified tools and an approval owner. Not suitable for inferring a load rating, universal connector compatibility or a waterproof claim from the reference photograph alone. Confirm the actual development scope and requested evidence with Weierken.
What to send for a focused Weierken review
Send the bag style, carrying position, tool list, connector samples or dimensioned drawings, proposed resting location and the buyer’s verification requirements. Include quantity planning and the destination market for quotation, without treating this article as a fixed MOQ, price or lead-time offer. Explore the waterproof bag collection as a starting point, then send the interface sheet with your enquiry.
From brief to sample
Build the right bag for your collection.
Share the intended use, product format, quantity and destination market. Weierken can review the construction and sampling requirements with your team.
Discuss your bag project Explore OEM & ODM